CIRCUITS
by Jon M. Stapleton
| If you want to know some really basic information about electronic components and how to prototype electronic devices, this tutorial is for you! This tutorial is intended to be the friendliest entry point into working with electronics. If there is one thing I should say, it's that you should not be afraid to play with electronics parts. The amount of amperage we work with in these projects is not enough to hurt, and it is pretty difficult to actually break these components. Play around, experiment and learn by doing. | 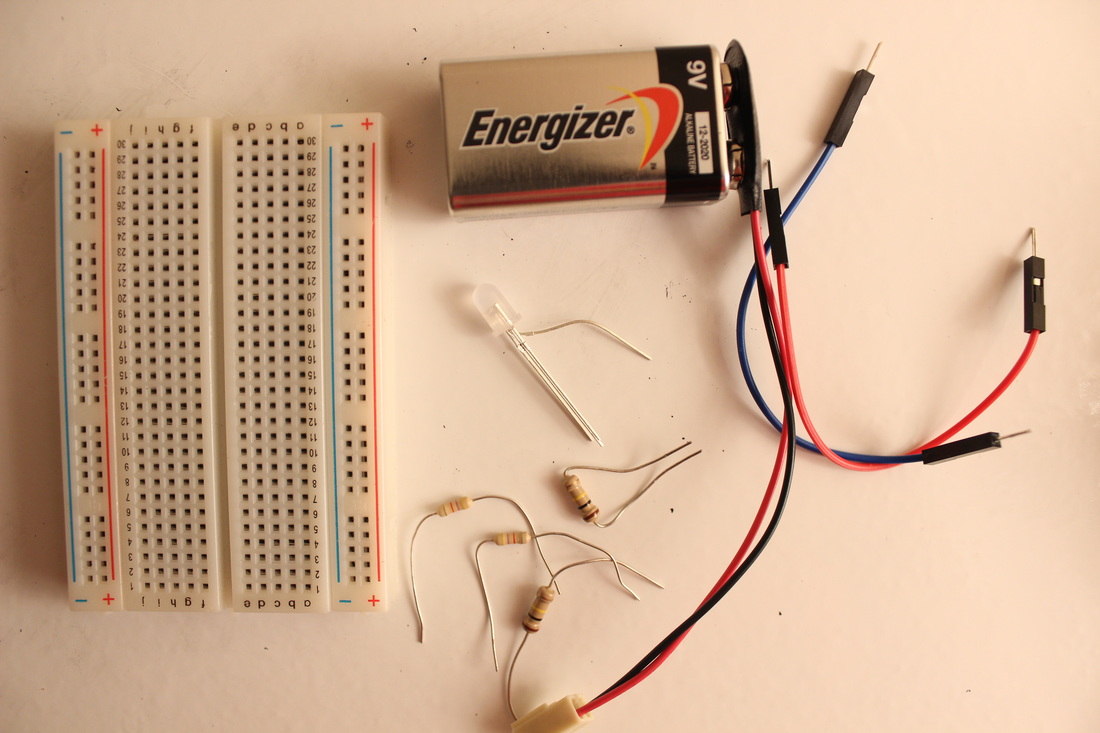 |
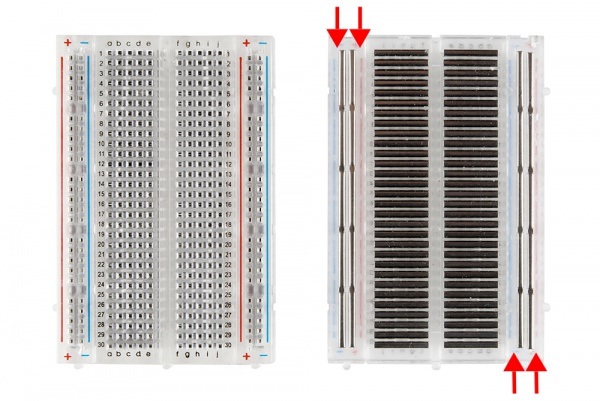 | step 1: breadboardingIf you already know how a breadboard works, go ahead and skip to step 2. If you don't, worry not. Breadboards are little platforms on which you build circuits to try them out. All you do is stick the component leads into the little holes, and the breadboard links them without soldering or making any permanent connections. The horizontal rows in this picture are called the rails—they form connections in a horizontal line, and usually carry the power and ground voltages. The holes in the middle are connected in vertical lines. Photo credit to Sparkfun. |
step 2: LEDsLight-emitting diodes (LEDs) are little lights. Stick one lead into the negative rail and the other into one of the rows in the middle of the breadboard. Then, pick a resistor (any resistor over 220 ohms will probably work) and use it to connect the row in the middle to the positive rail. If it doesn't work, flip the LED around so the leads swap places. Let there be light! What happens when you change the value of the resistor? *I put the resistor in the wrong place in this photo. It's fine for this step. | 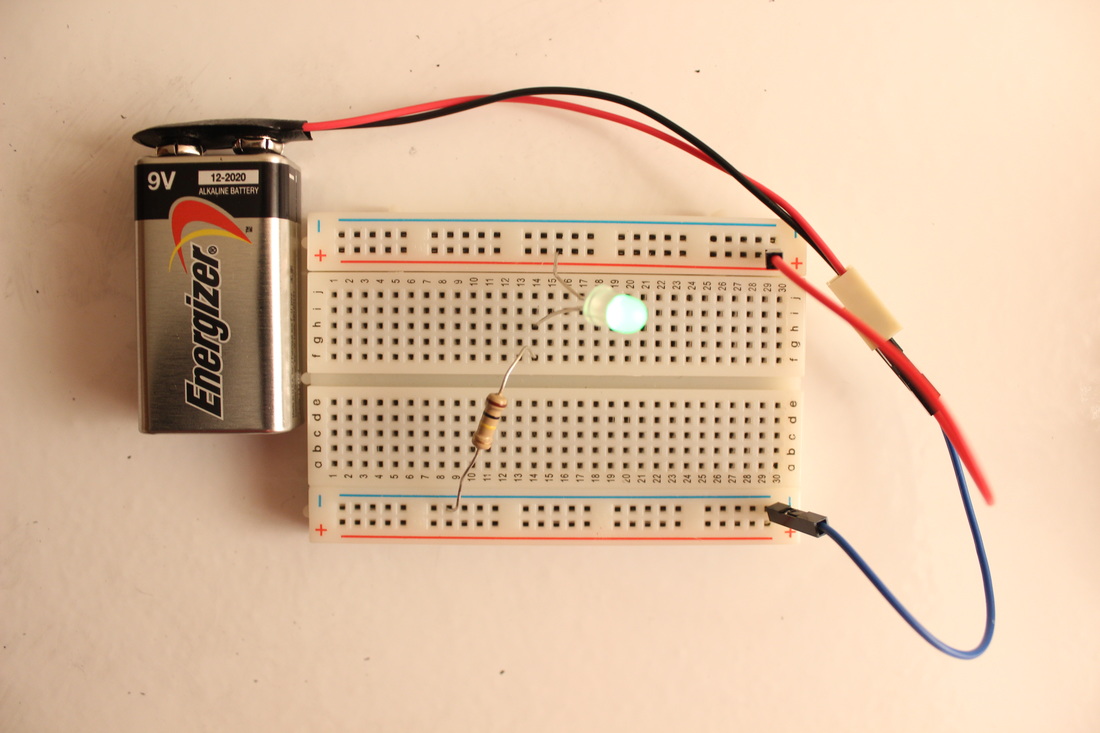 |
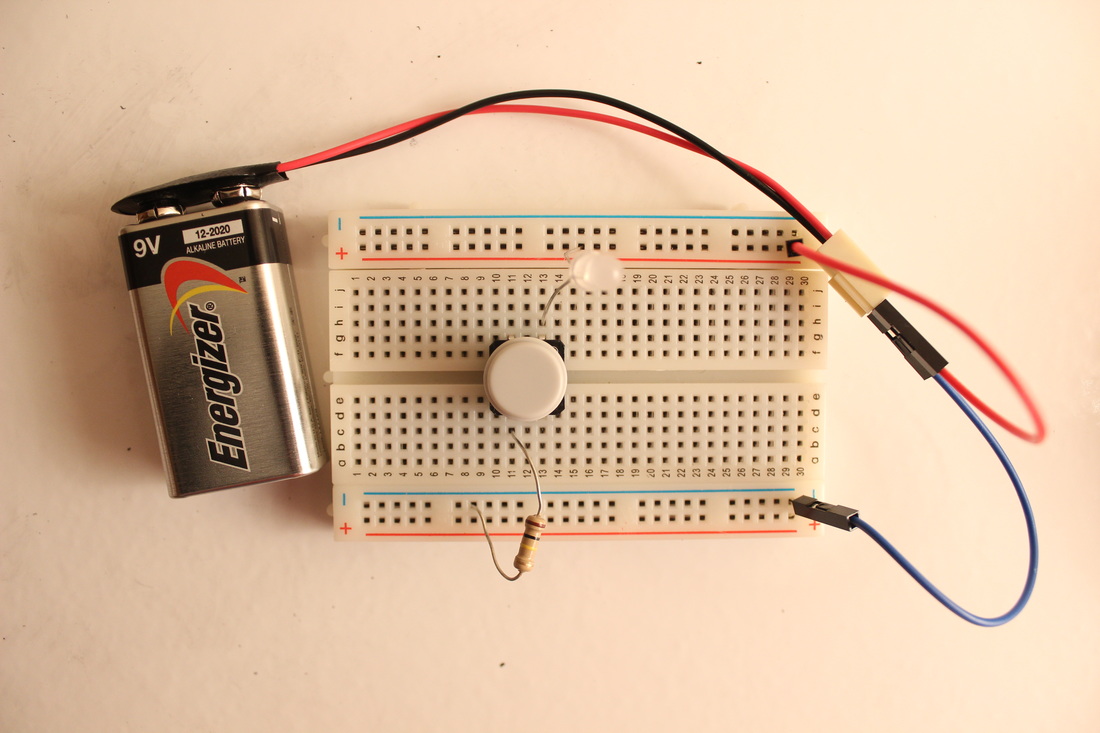 | step 3: switchesSwitches turn things on and off (you knew that already; my bad). Hook one up like shown, and control your light! Once again, the resistor is in an unsafe place. I learned while writing this tutorial that the resistor always goes between the anode (positive lead) and the power rail. |
step 4: potentiometersPotentiometers are a kind of variable resistor, meaning that they work the same as resistors except that they change value. Try using a potentiometer and a resistor at the same time. What happens to the LED when you turn the knob? The picture shows how to hook it up for optimal success. This is where I fixed the resistor because I burned out an LED in spectacular fashion. | 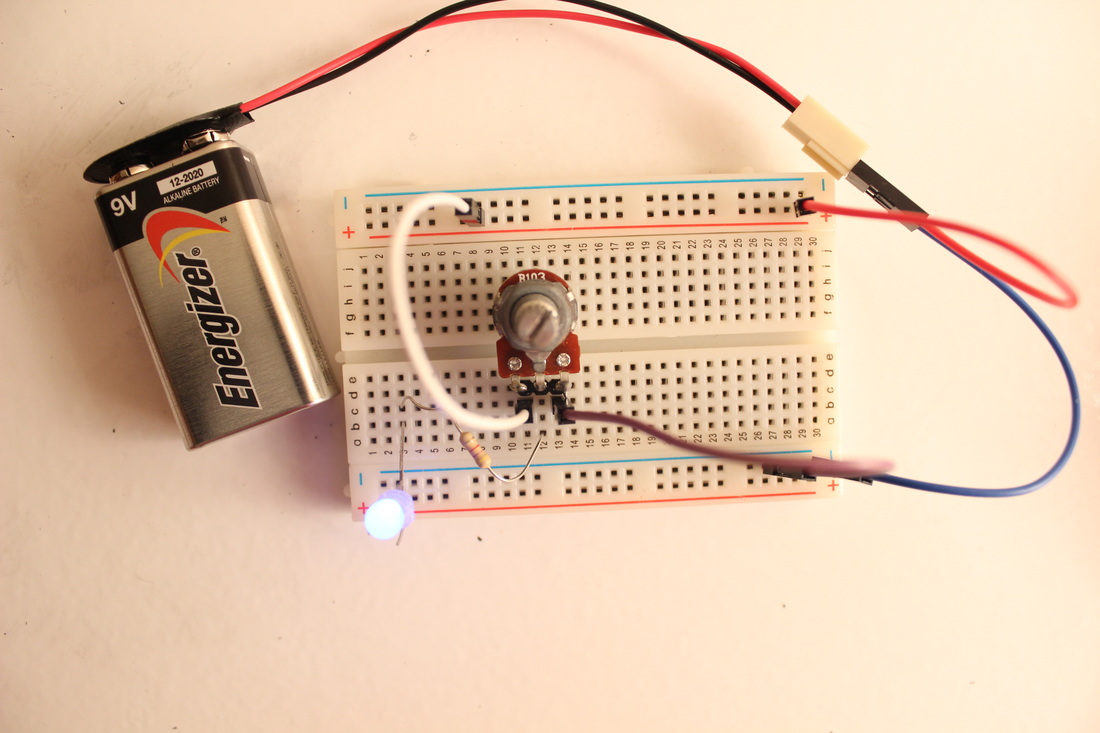 |
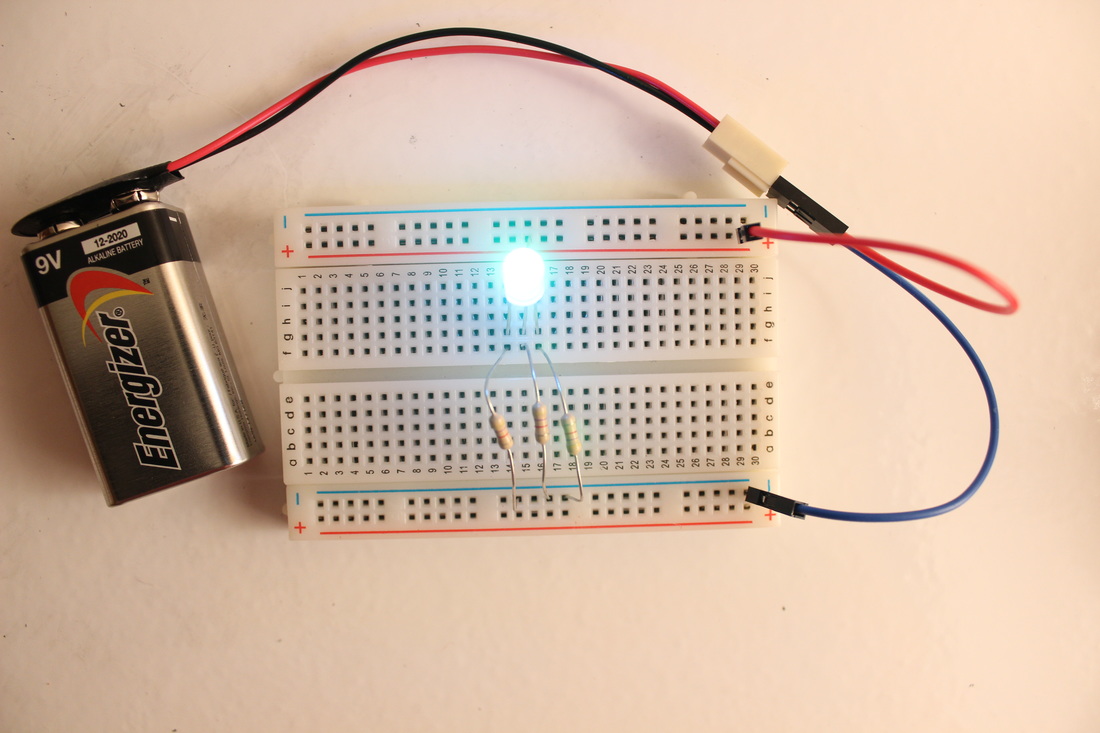 | step 5: RGB LEDsThis part always makes my heart sing a little. RGB LEDs are basically three different colors of LED in one tiny little package. The long pin is the cathode pin, which means that it connects to the negative rail (the opposite of cathode is anode, fun fact). The other three pins connect to positive voltage. Make sure you use at least one resistor per lead; the LEDs will burn out if they are exposed to too much power. I don't know a lot about color theory, but you can mix the lights together to create all of the rainbow colors. |
 RSS Feed
