LITTLEBITS
by Dr. Perry Shank
Building your own synthesizer has become more accessible through the introduction of LittleBits KORG Synth Kit. Powered by only a 9 volt battery and your creativity, you can make a playable instrument without worrying about wires, soldering, and breadboarding. Each ‘bit’ is a pre-assembled circuit that performs tasks such as filter, oscillate sequence, etc. With over 500,000 possible combinations you will be sure to make some original sounds! This tutorial is to help get you started making sounds so you can explore more later.
step 1:Start with the blue power module, an oscillator, and the speaker (or output jack). Make sure the red light of the power module is on and make some noise. By adjusting the pitch knob and tuning knob, you can further control the sounds you make. Explore switching between the sawtooth wave and square wave by flipping the switch on the right side of the oscillator module. |  |
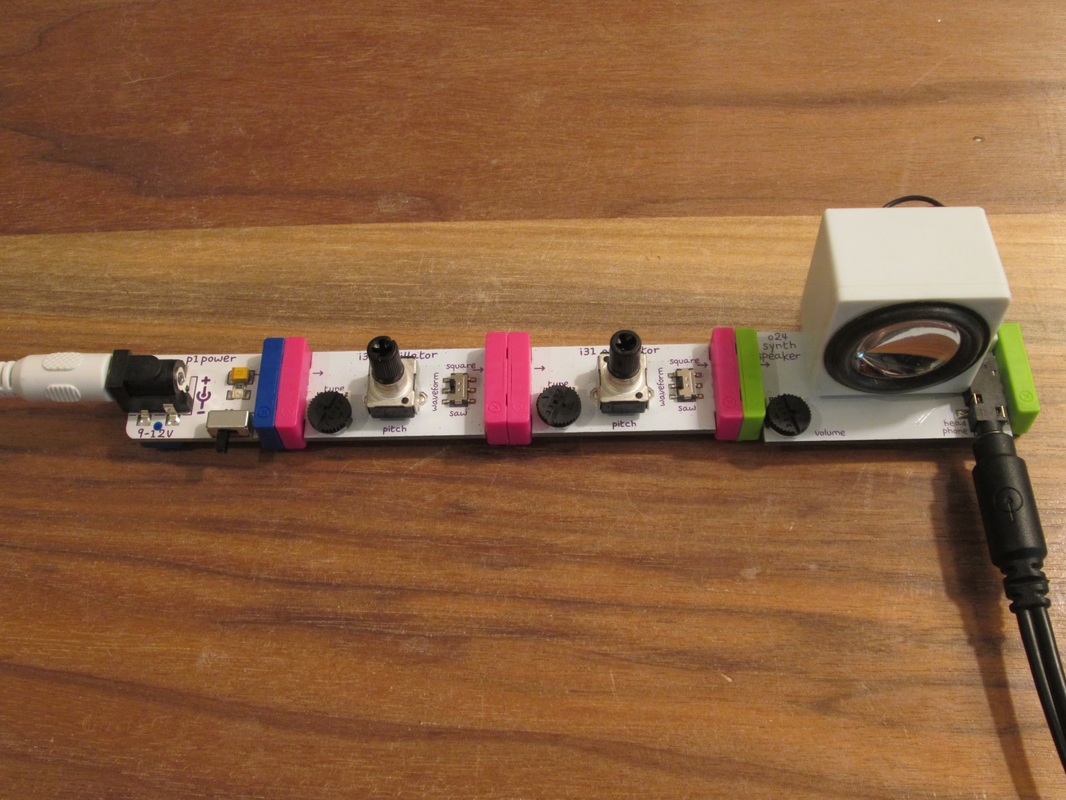 | step 2:Now let’s add another oscillator to the mix. By lining up the oscillators side by side, you are essentially feeding the first oscillator’s signal through the next one and creating a frequency modulation. What happens when you turn the first oscillator down to it’s lowest settings? What is the difference between the saw wave and the square wave in this setup? |
step 3:Take away one of the oscillators from step two’s line-up and add the keyboard module. By placing the keyboard before the oscillator, you are controlling the voltage that moves into the next bit. In this case it makes a fairly playable keyboard. | 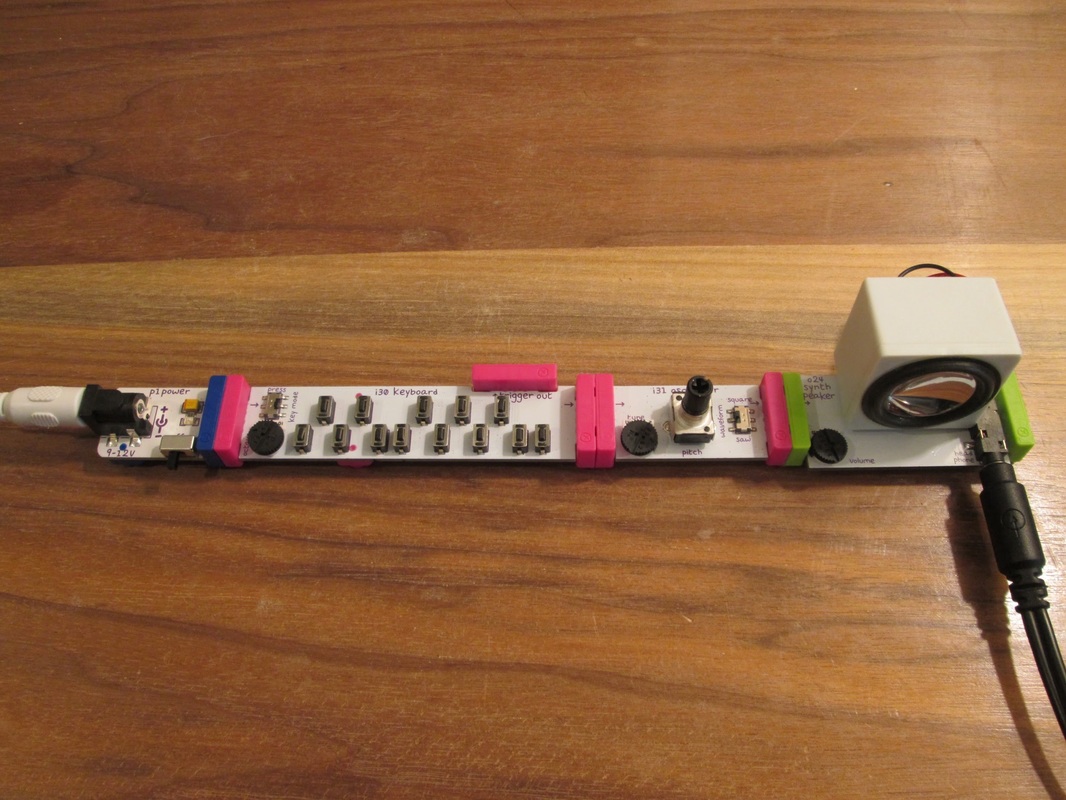 |
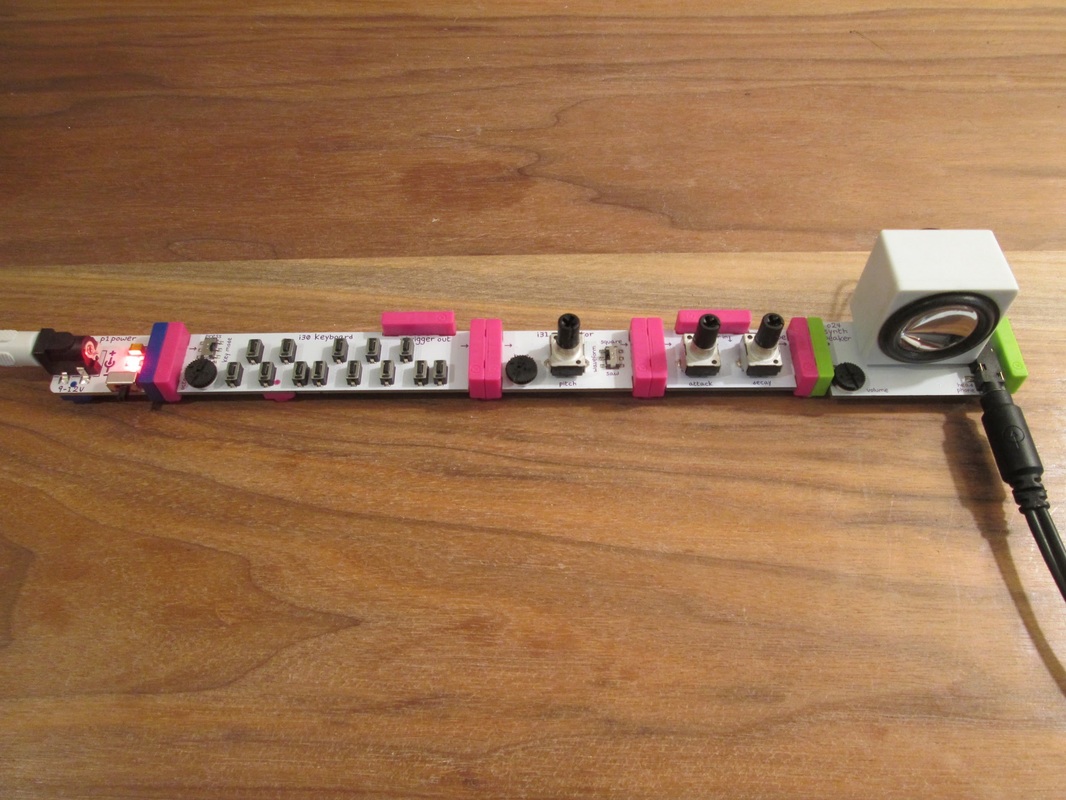 | step 4:By adding filters, envelopes, random, and delay modules after the oscillator, there are so many different sounds you can make. Try to make something that sings like a violin or slaps like an electric bass. Extra points for the weirdest sound! |
step 5:If for some reason you’re not having fun yet, follow these directions to create a synthesizer that modulates a sequence. First place the power module and attach the keyboard bit. Next in the line-up you’ll have one oscillator followed by the envelope module. Beside that add the filter and finally add your output device (speaker or output jack). Now look at the top of the keyboard module. Do you see the third bitSnap at the top? Add the sequencer module followed by the split module and connect the wires into the third bitSnaps at the top of the envelope and filter bits. With a bit of fine tuning, you will be able to modulate a sequence that you set on the sequencer by playing the notes on the keyboards. Amazing! | 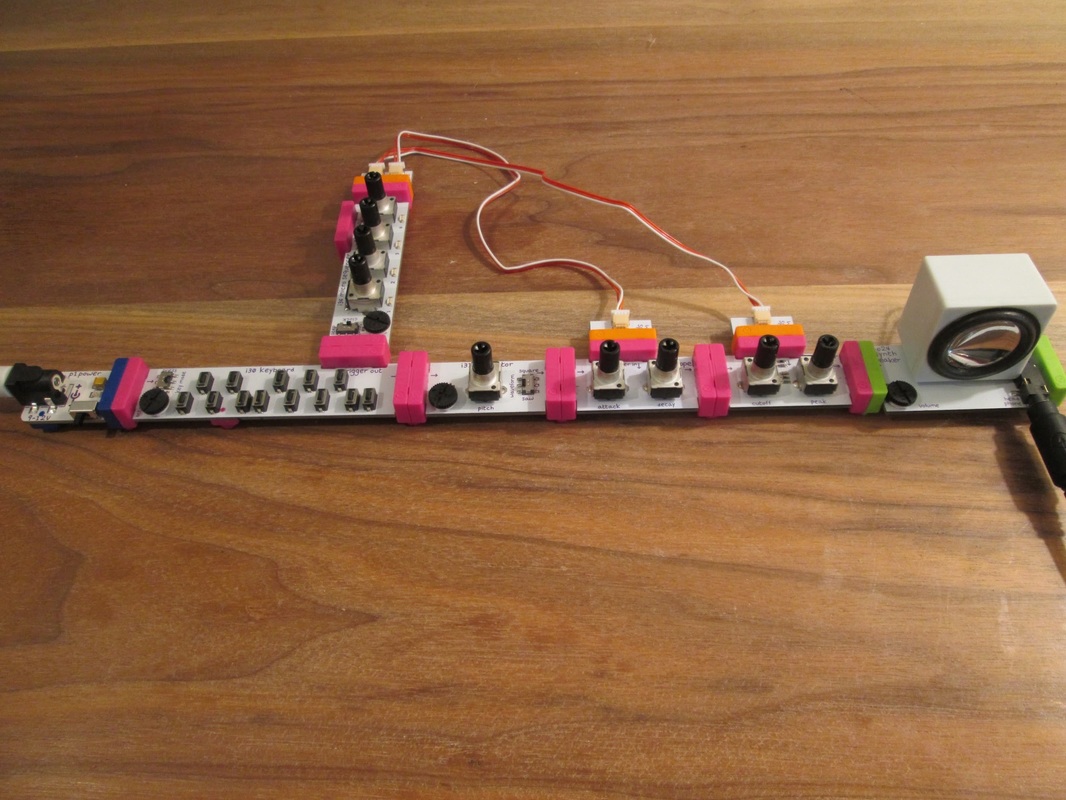 |
 RSS Feed
