MAKING A MIDI CONTROLLER
In March, we will be working with littleBits and building our own MIDI controllers. In order to do the latter, you will have to make a small financial investment for some prototyping tools. I will have some extra Teensy boards at the meeting, but I recommend buying your own board and parts if at all possible. Luckily, the price isn't too steep; for about $45.00 you can start learning how to create your own instrument, which could lead to projects like these:
| | |
If neither of those look interesting to you, don't worry! The great thing about building your own instrument is you can pretty much build anything you want. You are only limited by your budget and your knowledge. Without further ado, here is the list of parts you will need on March 7th!
midi controller parts:
| #1: Teensy LC This microcontroller is the brain of the controller. Teensy boards are the best of both worlds: HID compliant (no drivers!) and easy to use, thanks to the Arduino IDE. It is the most expensive component in the kit; I have many extras but if you want to keep your own you'll have to bite the bullet. | 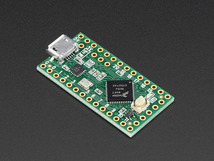 |
| #2: Breadboard Breadboards are for prototyping. They allow you to create temporary connections between different parts to make sure everything works before building the permanent circuit. | 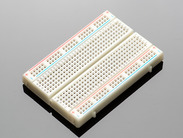 |
| #3: Header Pins These pieces allow you to stick the Teensy LC into the breadboard and start prototyping your controller. If you plan on building a lot more controllers, buy extra. I am always running out of them and it's the worst . . . | 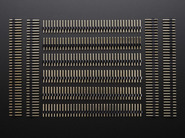 |
| #4: Buttons You are most likely familiar with buttons. These ones can be mounted onto your breadboard so that you can connect it to your Teensy and begin using the buttons as inputs. | 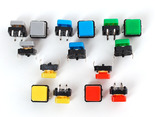 |
| #5: Potentiometer You are also most likely familiar with potentiometers, a.k.a. knobs. Buttons are excellent for on/off controllers; pots are used for continuous controls and output variable voltage between 0 and the maximum value of the board. |  |
| #6: Wire Bundle These allow you to connect everything on the breadboard together. They shouldn't be used for permanent connections, but are useful for prototyping and reusable until they break. | 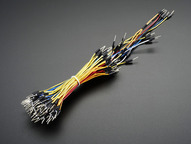 |
| If you have any questions, please let me know by commenting on this post. I look forward to working with all of you in a month! If you know that this kind of thing is something you'll want to learn more about, check out my Survival Guide for everything you will need to go from parts to fully constructed musical instrument. If you have no idea what MIDI is, check out this post. It is geared toward acoustic musicians, but even if you don't play an instrument or sing it can give you a little background. |
 RSS Feed
